How to | Cellulose Transfer Print
Cellulose transfer printing isn't a traditional printmaking technique but it can create prints with a similar appearance to etching - my cellulose prints have actually been mistaken for etchings a few times!
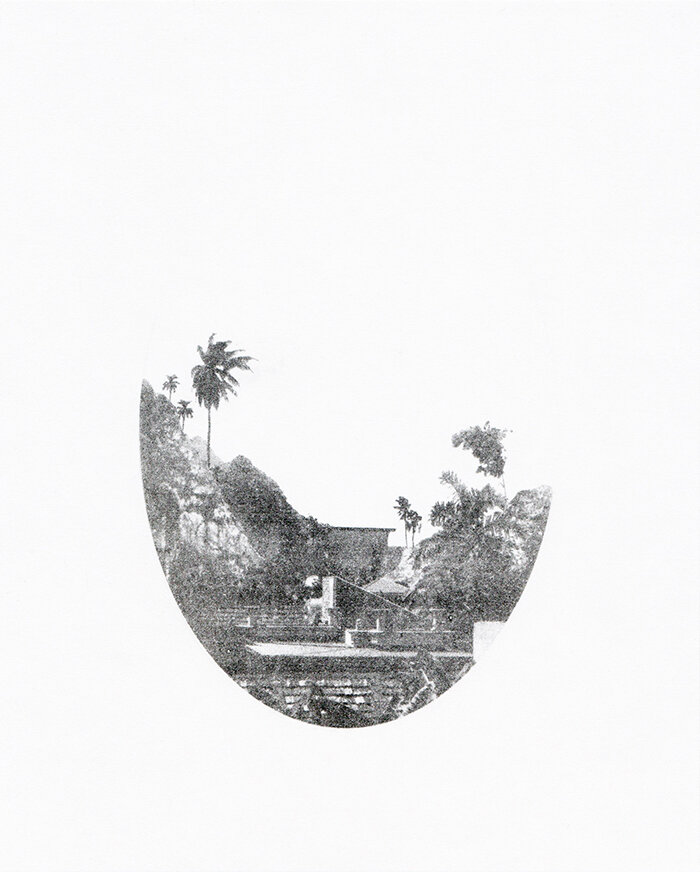

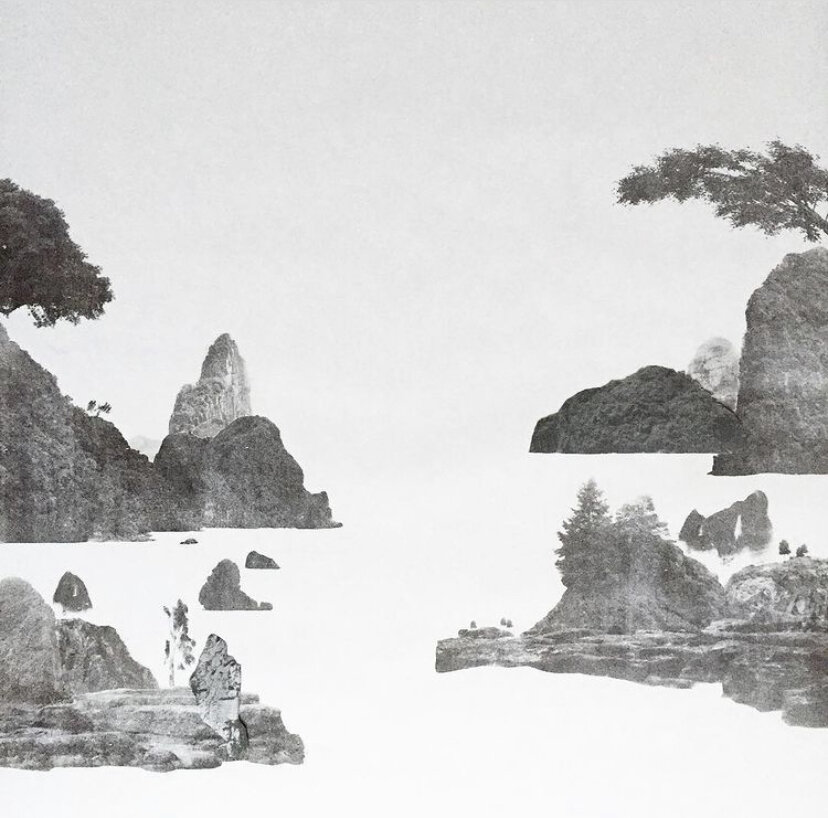
Left: Emerald Mount (West), Cellulose transfer print, Limited Edition of 10
Right: Calm White River, Cellulose transfer print, Original print
It's quite a simple process but can sometimes be a bit tricky to get a good pay off. Printmaking by nature lends itself to being quite experimental in the process, and experimentation is how I came about the way I have found to get the best results when cellulose transfer printing.
To create a cellulose transfer print, you will need a laser printer (I have a Brother one) or access to a photocopier that prints with toner, not ink - generally the photocopiers at local shops and Post Offices print with toner. The toner of a laser print is needed, opposed to a regular inkjet print.
My artworks begin as either an analog collage or a digital collage. With the digital collage, it can simply be printed off and transferred as a whole image. When creating them in the cut and paste way, I will cellulose transfer individual parts as I go along or collage a section, scan it in and then print that part off to transfer, building the image up as I go along.

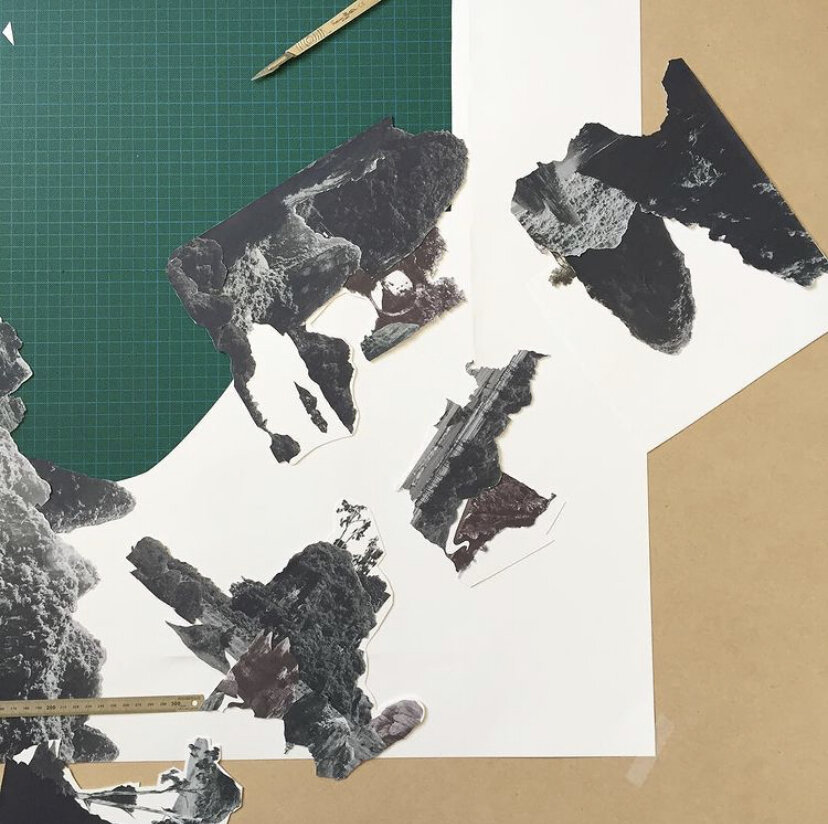
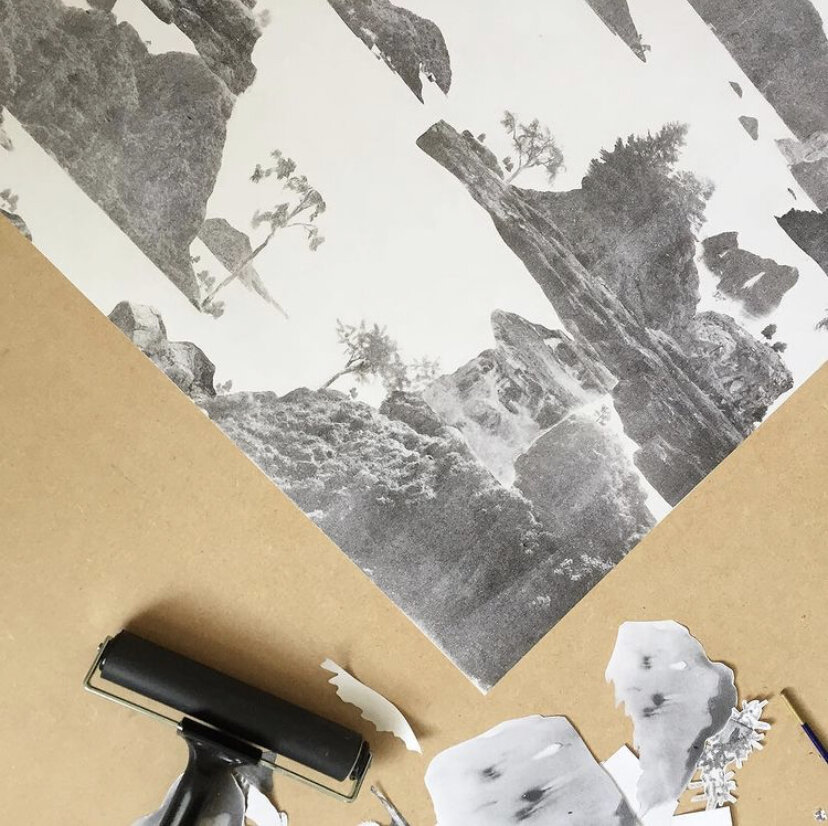
Process pictures from creating my original print ‘Calm White River’ in sections.
One day I was printing and wondered how I could get a better quality transfer of my artwork, so instead of putting the cellulose thinners on the back of the print/photocopy and rubbing on the back vigorously with a cloth or spoon to transfer the image (which is the way I had been taught), it occurred to me to try putting the thinners on the paper I wanted to transfer my image to instead. After all, it was the toner I wanted to transfer over to the other piece of paper, so surely having more of a direct contact might work better? I tried it and after a bit of trial and error, I had better results than I'd ever had before.
Below is a step by step guide of the process I now use to get successful results every time. This technique can be used to create both original and limited edition prints. You can also create coloured prints if you have a laser printer that prints in colour.
Process pictures from creating my original print ‘Maze of Inlets’ where I transferred individual parts as I went along.
What you will need to Cellulose transfer print:
- Your artwork or an image/photograph
- Laser printer or photocopier
- Roller
- Cellulose thinners
- A pot to decant the thinners into
- Paint brush
- Gloves
- Paper to transfer your image onto
- Tweezers (not essential)
Step 1:
Flip your image before printing or photocopying so that when you transfer it, it will be the right way round!
Step 2:
Depending on the shape/size of your image that you're transferring, you may also want to cut it out so that you can place the image in the exact place that you want to print it.
Step 3:
Prepare the paper you want to transfer the image to. You may need to draw on or register with a stencil some marks if you want to create an edition.
I have found paper with a smooth surface to work best - Japanese paper, cartridge or arcoprint papers work well.
Step 4:
Make sure you are wearing gloves, you want to avoid getting it on your skin. Also, do it in a well ventilated space/have windows open.
Pour some of the cellulose thinners (generally I use the brand Rustins) into a pot - you won't need too much as it spreads a fair bit but you can always adjust the size of your pot and paint brush according to your surface area.
Using a paint brush (I find a stiff bristled one works best), apply the thinners to the surface area that you want your image to transfer to and leave it to evaporate a little bit - this is key otherwise your image will just smudge if you try and transfer it too soon. It evaporates quite quickly, so have your image readily cut out and by you.
Step 5:
Place the laser print or photocopy toner side down over the area that you have just coated in thinners so that the toner is in direct contact with the thinners.
Step 6:
Take your roller (I use a hard rubber one) and roll over the back of the image applying even pressure.
Step 7:
Carefully peel away your laser print/photocopy from the paper. You might find a pair of tweezers handy as sometimes it can 'stick' to the transferred paper.
Hopefully you have a vivid image transferred!
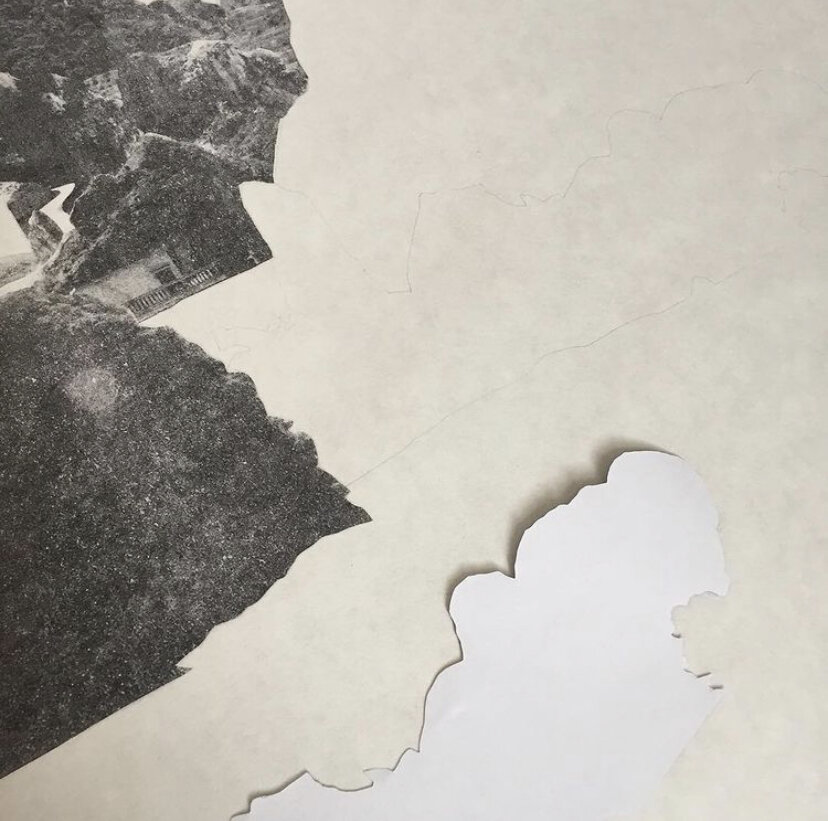
If you want to create an image as you go along, just repeat the process but first, draw around the shape of the paper reversed (as pictured below) so that you know exactly where to place it - you can rub out pencil marks after printing.
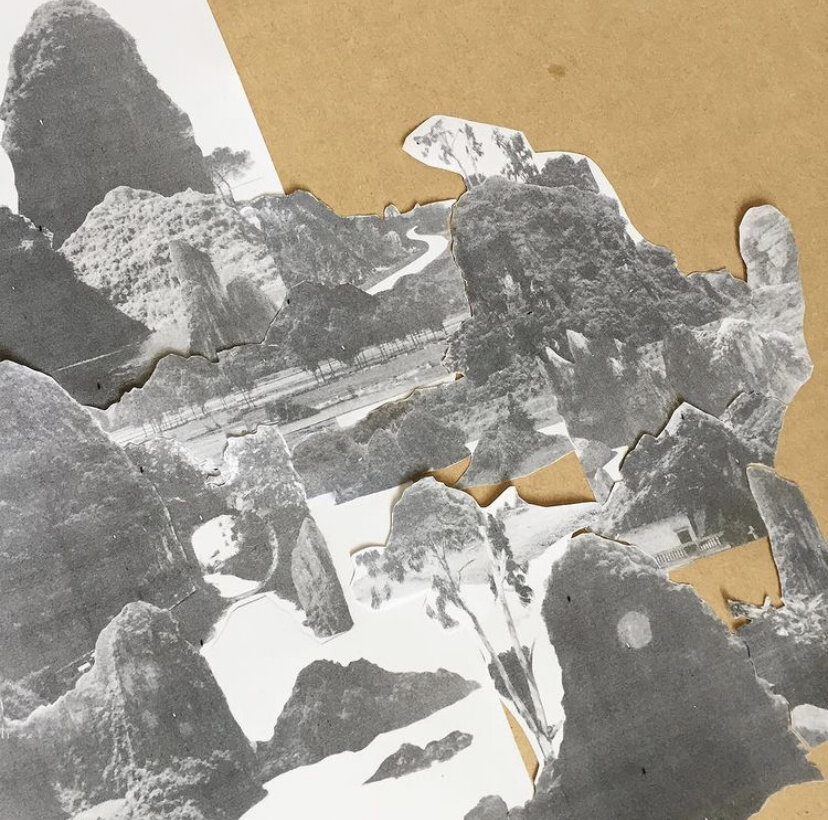
Process pictures from creating my original print ‘Calm White River’ in sections.
The process is quite simple, it just took a bit of experimenting for me to get a good finish each time. Some of the photocopiers at the Post Office etc. can enlarge images quite big - I have created prints with this technique as big as 50 x 70cm before, you just need to be quicker at applying the thinners all over so that it doesn't evaporate too quickly! It isn’t necessary but thought it worth mentioning that I sometimes like to spray finish some of my prints with a coat or two of matt varnish for UV protection.
Let me know if you have a go, I'd love to see. Or if you have any other questions, get in touch, I'm happy to help.
For exclusive offers and to be the first to hear about insights into my practice, sign up to my newsletter.